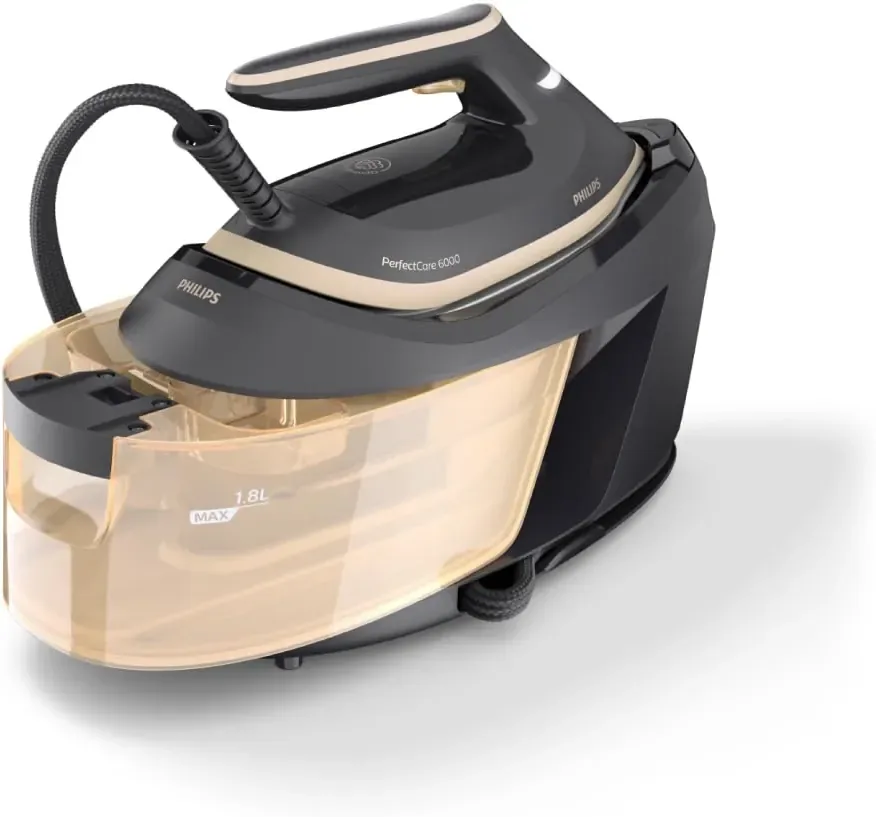
How to iron a shirt with a steam generator, step by step
A crisp collar, perfect cuffs, sleeves without a stray crease: a shirt is the real test of ironing. Here is the complete method with a steam generator iron, step by step, with the techniques that make the difference.
Contents
A shirt brings together every challenge in ironing: thick and thin areas, seams, buttons, creases you want sharp and others you want gone. A steam generator makes the job easier thanks to its steam output, its steam boost and, on models such as the Philips PerfectCare 6000, a single temperature that does away with settings. This guide complements our comparison steam generator or steam iron.
Preparing the shirt and your set-up
- Start with a slightly damp shirt if you can, straight from the washing machine or misted with a spray bottle: creases come out faster.
- Undo all the buttons, including those on the cuffs and collar.
- Remove the collar stiffeners if they are removable.
- Check the care label: most cotton, blended and linen shirts can be steam ironed.
- Get the steam generator ready: tank filled, heat-up complete (about 2 minutes on the PerfectCare 6000), first burst of steam into the air.
- Have a hanger ready with wide shoulders so you can hang the shirt as soon as it is done.
The order that changes everything
You iron a shirt from the small areas to the large ones. Starting with the fronts would mean creasing them again while you handle the sleeves and collar.
| Order | Area | Why |
|---|---|---|
| 1 | Collar | The most visible area, done first |
| 2 | Cuffs | Small, thick areas |
| 3 | Sleeves | Before the body, so you do not crease it |
| 4 | Yoke | The top of the back, over the narrow end of the board |
| 5 | Left front, back, right front | The large surfaces last |
The method in 9 steps
- The collar, underside. Lay the collar flat, underside facing you. Iron from the points towards the centre so you do not push creases into the points. Use the tip of the soleplate.
- The collar, top side. Turn it over and iron the same way. Then fold it along its line and lightly press the fold.
- The cuffs. Open them out flat, iron the inside then the outside, working from the edge inwards. A burst of steam on thick cuffs.
- The sleeves. Lay a sleeve flat, seam lined up with the edge of the board. Iron from the shoulder to the cuff. Turn it over and do the other side. Repeat with the second sleeve.
- The yoke. Slip the shoulder over the narrow end of the board and iron the top of the back, from one shoulder to the other.
- The button-side front. Iron around the buttons with the tip, never over them. Slide the tip between the buttons.
- The back. Rotate the shirt on the board and iron the back in large sweeps, with continuous steam.
- The buttonhole-side front. Iron the placket flat, then the rest of the front.
- Hang it straight away. Do up the first and third buttons and let it cool for a minute or two before putting it away or wearing it.
Safety: never iron a shirt while someone is wearing it, even for a quick touch-up, and never point the steam at your hand or anyone else’s.
Depending on the shirt fabric
| Fabric | Result with a steam generator | Tip |
|---|---|---|
| Cotton poplin | Excellent | Continuous steam, shirt slightly damp |
| Oxford | Excellent | Steam boost on the collar and cuffs |
| Polycotton | Very good | Quick strokes, inside out if it goes shiny |
| Non-iron | Very good | A light pass is often enough |
| Linen | Very good | Damp, steam boost, inside out for dark colours |
| Flannel | Good | Do not press down, to keep the loft |
| Silk, viscose | Good | Inside out, quick strokes, test on a seam |
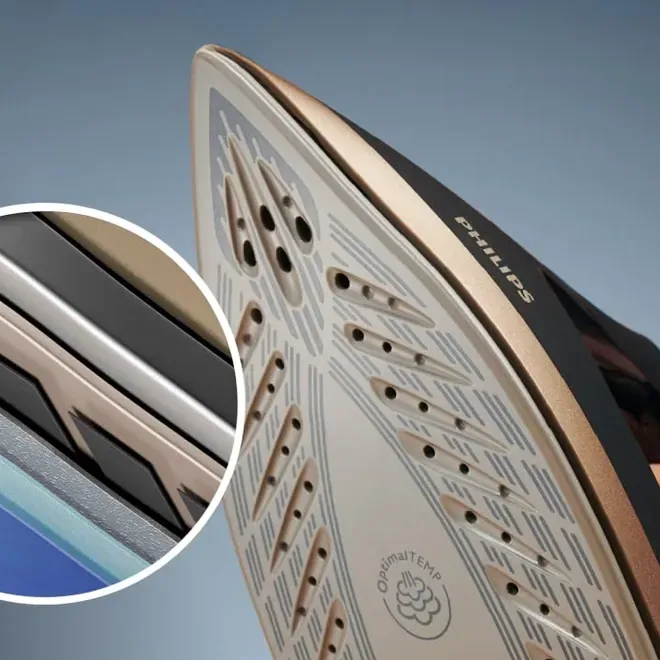
With a single temperature such as OptimalTEMP on the PerfectCare 6000, there is nothing to adjust between a poplin shirt and a viscose one: Philips guarantees no burns on ironable fabrics.
The techniques that make the difference
- Hold the fabric taut with your free hand, without placing it in front of the soleplate.
- Press the steam trigger a moment before you move: the steam takes a second to arrive.
- Iron along the grain, in the direction of the weave, so you do not pull the shirt out of shape.
- Use the precision tip around buttons and in the pleats at the cuffs.
- Finish each area with a pass without steam to dry and set it.
- Go easy on the steam boost: a few seconds on thick areas, not over the whole shirt.
Common mistakes
- Starting before the heat-up is finished: drips leave marks on the fabric.
- Forgetting the first burst into the air: water from the hose lands on the shirt.
- Ironing over buttons: they get marked or break, and the soleplate gets scratched.
- Ironing the collar from the centre out to the points: creases form at the points.
- Leaving the shirt on the board: it creases as it cools.
- Too much steam on a thin fabric: it stays damp and creases again.
White, dark and patterned shirts
White shirts
They show the slightest trace of limescale or a dirty soleplate. Make sure the soleplate is clean, release a burst of steam into the air and descale as soon as the light tells you to.
Dark shirts
They go shiny easily on the right side, especially polycotton. Iron them inside out, particularly the collar and cuffs.
Patterned shirts
Checks, stripes and prints are more forgiving of small creases. Iron prints inside out to protect them.
Ironing the week’s shirts
A steam generator really comes into its own when you iron all five of the week’s shirts in one go:
- Get five hangers ready and a rail or a door nearby.
- Fill the tank: 1.8 L on the PerfectCare 6000, more than enough for every shirt.
- Work through the shirts one after another, with no change of setting thanks to the single temperature.
- Hang each one straight away and space the hangers out.
- Put them away once cool, without cramming them into the wardrobe.
In the morning, a quick pass with a handheld steamer is enough if a shirt got marked in the wardrobe.
Folding or hanging
A shirt keeps best on a hanger, with the first and third buttons done up. If you have to fold it, for a suitcase or a drawer, wait until it is cool and dry, lay it face down on the board, fold the sleeves diagonally across the back, bring the sides in towards the centre, then fold the bottom up in two.
A wavy collar: fixes
A collar that ripples after washing is usually down to interfacing that has shrunk differently from the fabric. Iron it damp, on the underside, gently pulling the points, working from the points towards the centre. A burst of steam helps relax the interfacing. Let it cool flat and under slight tension for a few seconds before folding it.
Linen shirts
Linen creases a lot and holds its creases. A steam generator is the best tool for it: iron the shirt very damp, or even still wet, inside out for dark colours, with continuous steam and the boost on stubborn creases. Finish with a pass without steam to dry it. Perfectly smooth linen does not stay that way for long once worn: that is its nature. Our article ironing linen, jeans and bed sheets goes into more detail.
How long per shirt
With a hot steam generator and a bit of practice, allow a few minutes per cotton shirt, a little longer for oxford or linen. The collar and cuffs take the most care; the large surfaces go quickly thanks to the steam output. The time saved really shows over a batch: the heat-up time is spread across every shirt.
Fewer creases from the wash
- Do not overload the drum.
- Choose a shirts programme or a gentle spin.
- Take the shirts out as soon as the programme ends.
- Shake them out and put them straight on a hanger, collar buttoned.
- Tug the seams, cuffs and placket straight while they are damp.
A shirt dried on a hanger takes far less work. For the appliance, our reference model is the Philips PerfectCare 6000, whose precision tip makes work around buttons easier.
The right kit for shirts
A good steam generator cannot do everything on its own. A few accessories make ironing shirts quicker and neater:
- A board with a narrow tip to slip the shoulders over and work on the yoke.
- A sleeve board, a small board for sleeves, to iron them without a crease down the middle.
- A thick, breathable cover that lets steam through and stops moisture sitting under the fabric.
- Wide-shouldered hangers, in wood or thick plastic, so the shoulders keep their shape.
- A spray bottle to dampen a shirt that has dried out too much.
- A thick towel to slip under the placket so you can iron inside out without flattening the buttons.
Sleeves without a stray crease
Sleeves are often the trickiest part. There are two schools of thought. With a pressed crease, you lay the sleeve flat, seam lined up with the edge of the board, and iron right to the edge: a sharp crease forms along the top, as on classic suit shirts. Without a crease, you use a sleeve board or a rolled towel slipped inside the sleeve and iron as you turn it: the sleeve stays round, with no line.
Either way, iron the sleeve placket and the cuff first, then the sleeve from shoulder to cuff, smoothing the seam with your free hand. If a stray crease appears, dampen the area with a little steam and iron again.
Using the steam boost on a shirt
The steam boost is useful on a shirt, but in moderation. Save it for thick, stubborn areas: collar, cuffs, yoke, deep storage creases. On large areas of fine poplin, continuous steam is enough, and a heavy boost risks leaving the fabric damp. After a boost, always do a pass without steam to dry and set the area. Buyers of the PerfectCare 6000 mention a stronger mode triggered by pressing the steam trigger twice, handy for a badly creased collar.
Slim-fit and stretch shirts
Many shirts today contain a small percentage of elastane for comfort. This fibre does not cope well with excess heat or strong pulling: if it is stretched too much while hot, the fabric can stay distorted. Iron these shirts without pulling the fabric, with quick strokes and moderate steam, and let them cool on the hanger before wearing. On slim-fit cuts, the back darts are best ironed over the narrow end of the board, following their shape, rather than flattened. With a single temperature designed for all ironable fabrics, the risk of scorching the elastane goes away, but the tension still depends on your hand: gentleness first.
Formal shirts and double cuffs
Formal shirts with double cuffs, the kind worn with cufflinks, need a slightly different approach. The cuff is twice the length of a standard one and folds back on itself, so iron it fully opened out first, inside then outside, with a burst of steam to deal with the thickness. Then fold it back along its natural line and press the fold lightly with the tip of the iron, without flattening the roll completely: a soft fold looks better than a sharp one.
Wing collars and stiff collars on dress shirts are ironed flat on both sides, from the points inwards, then shaped by hand while still warm. Bib fronts with pleats are worked one pleat at a time with the precision tip, from the top down. Take your time on these pieces: they are worn for special occasions, and a few extra minutes make all the difference.
Travel shirts and touch-ups
A steam generator does not travel: for a shirt creased in a suitcase, a handheld steamer does the job at the hotel. At home, if a shirt ironed on Sunday has picked up a mark in the wardrobe, there is no need to get the board out again: a pass with a handheld steamer or vertical steaming with the generator, iron held a few centimetres away, is often enough. Save the full steam generator session for the week’s batch, where it saves the most time.
An efficient weekly routine
For anyone who wears a shirt every day, a simple routine works well: wash on Saturday with a gentle spin, dry on hangers, an ironing session on Sunday with the steam generator, shirts hung with space between them in the wardrobe. In about half an hour, all the week’s shirts are ready, and in the morning all that is left is to choose. This set-up makes the most of what a steam generator does best: working through several garments without a break, with a large tank and a temperature that never changes.
With these pointers, a shirt becomes just another garment: a few minutes each, a crisp collar, perfect cuffs, and no worry about scorching a delicate fabric.
Finally, do not overlook storage: shirts spaced out in the wardrobe on good hangers keep the benefit of ironing for several days, while shirts squashed together crease again by the next morning.
Frequently asked questions
Where do you start when ironing a shirt?
With the collar, then the cuffs, the sleeves, the yoke, and finally the fronts and the back.
Should you iron a shirt damp?
Slightly damp, it irons faster, especially cotton and linen. With a steam generator, it is not essential thanks to the steam output.
How do you avoid creases on the collar?
Iron it flat, from the points towards the centre, first on the underside and then on the top side.
Should you iron a shirt inside out?
For dark, shiny or printed shirts, yes, at least the collar and cuffs. For the others, the right side is fine.
How many shirts per tank?
With a 1.8 L tank like the one on the PerfectCare 6000, you can comfortably iron a week’s shirts without refilling.
How do you iron around buttons?
With the tip of the soleplate, sliding it between the buttons, never over them. For a perfect finish, iron the placket inside out on a thick towel.
Crisp laundry, in less time.
8 bar · 150 g/min · 600 g steam boost · 2400 W · 1.8 L tank. The price changes often on Amazon: check it, along with the seller, the PSG6064/80 model number, the UK plug and the returns policy, before you order.
Check the price on AmazonAffiliate link · new tab